Importing Data
The program includes a powerful import mechanism that can import resources, activities, or entire timetables from CSV or XML files.
The import process consists of two steps: first, specifying the file and its type; second, telling the program what type of data is contained in each imported field or column.
Contents
How to import data?
First, create a new file or open an existing one. The data will be imported into that file. Then select File → Import from the main menu to open the Import window.
Next, select the type of file from which you want to import data. The program supports two file types: CSV files and XML files. You can select the appropriate type in the Import From field at the top of the window.
CSV File
A CSV text file is the most common format used to export data from many applications. For example, Excel can export a spreadsheet to a comma- or tab-delimited text file. Such files have a very simple structure. They consist of lines of text, with each line containing one or more fields (columns) of data. The fields are usually separated by a specific character, such as a comma or a tab.
XML File
An XML file is another format commonly used by applications to store and export data. While the contents of XML files can vary greatly from one use case to another, their underlying structure remains the same. Our program can parse any XML file and extract all field values from it. You only need to tell the program which fields correspond to which types of data.
How to select the file for import?
After specifying the type of file you want to import, select the actual file by clicking next to the File field. A "File Open" window will appear, allowing you to browse the folders and files on your computer and choose the file you want to import.
How to tell the program what kind of data each column contains?
Once you have specified the file format and selected the file, the program will read its entire contents. At this stage, it can identify the individual fields of data, but it does not yet know what type of information each field contains.
The program will then display all the fields (or columns) it was able to extract from the file. Each field will appear as a separate item in a list. The title of each item will be the first value found in that field. For example, if you are importing a text file whose first column contains room names such as:
Room Name, ...
Room 1, ...
Room 2, ...
Room 3, ...
The program will display an item named "Room Name". To help you identify the field, you can expand the item using the plus button next to it to view up to 10 additional values from the same column, such as "Room 1", "Room 2", and so on. The total number of values found in the field is also shown at the bottom.
Once the fields are displayed, you need to specify the type of data contained in each one. To do this, click the area to the right of a field and select the appropriate data type from the pop-up list. This list contains all available properties of resources, activities, and scheduled cells.
The selections you make depend on the type of data you are importing, so let's look at the most common import scenarios.
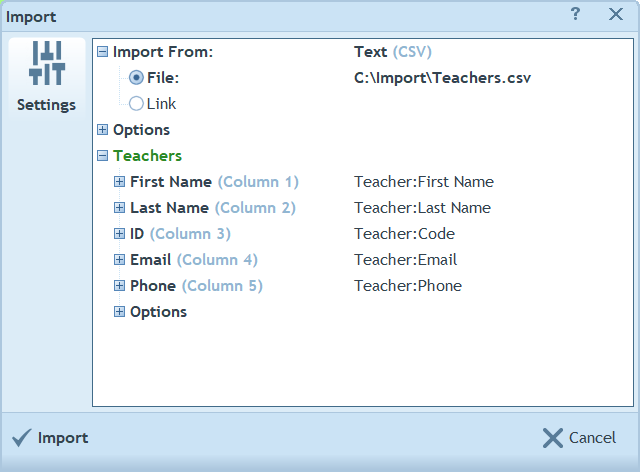
Scenario 1: Importing Resources
In this scenario, you want to import a list of resources, where each item in the imported file (for example, each line in a CSV file) represents a single resource. If you are importing activities instead, follow the steps in the next section. However, it is still worth reading this section, as many of the concepts apply to activity imports as well.
At this stage, the columns extracted from the imported file are displayed in the Import window. Next to each column is a clickable field that initially displays Click to choose.... Clicking this field opens a pop-up list containing all available resource types and their properties.
Locate the resource type you are importing and expand it using the small plus button. A list of available properties will then be displayed. Select the property that corresponds to the data in the imported column by clicking the check box next to it.
Repeat this process for each column you want to import. When you have finished mapping the columns, click the Import button at the bottom of the window.
Note: If you need to import data into a property that does not appear in the list, select New Property. This will allow you to create a new property and import the data into it.
Scenario 2: Importing Activities
To import activities, each row in the imported file must contain multiple fields. Each field represents a different type of resource, and together these resources form a single activity. It is not necessary to import the resources separately, because importing activities automatically imports any resources referenced by those activities.
In the pop-up list displayed next to each column, you will find an item called Activity. Expanding this item reveals all available resource types that can participate in an activity. For each column containing a resource name, select the appropriate activity resource type.
For example, if your file contains activity data in the format:
"Class X, Subject Y, Teacher Z, No. of periods per week"
Assign the following data types:
- First column → Activity:Group
- Second column → Activity:Subject
- Third column → Activity:Teacher
- Fourth column → Activity:Quantity
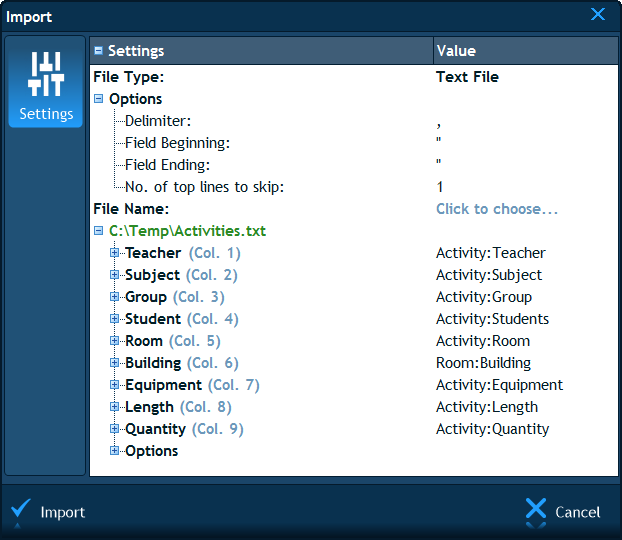
If the imported file contains additional resource properties besides resource names, these can be imported during the same operation. For example, suppose the file contains the following columns:
"Group, Subject, Teacher, Students, Room, Building"
In this case, assign:
- Group column → Activity:Group
- Subject column → Activity:Subject
- Teacher column → Activity:Teacher
- Room column → Activity:Room
- Building column → Room:Building
As a general rule, columns containing the names of resources participating in an activity should be assigned the data type Activity:[Property] while columns containing additional properties of those resources should be assigned [Resource]:[Property].
When the import process encounters a new resource name as part of an activity, it first searches for any associated properties of that resource. It then imports the resource together with all available property values and, finally, imports the activity itself.
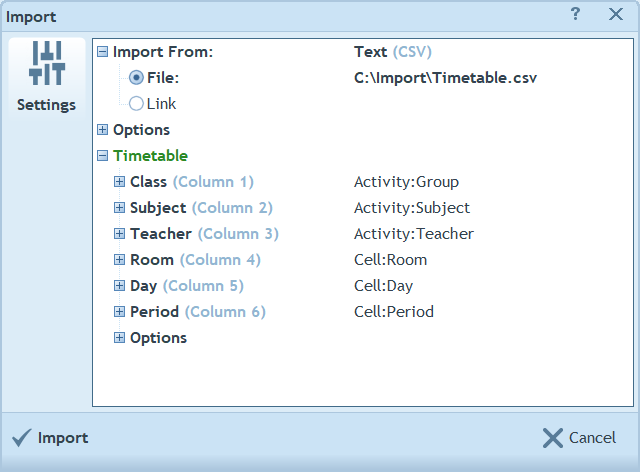
Scenario 3: Importing an Entire Timetable
In this scenario, you are importing a file that contains all scheduled occurrences of activities, with a specific day and time assigned to each occurrence. For example, one row might contain:
"Group X, Subject Y, Teacher Z, Monday, Period 1"
and another:
"Group X, Subject Y, Teacher Z, Tuesday, Period 2"
These rows represent two separate occurrences of the same activity.
The resource columns should be mapped as described in the previous section. However, the columns containing scheduling information should be assigned using the Cell item in the pop-up list.
The Cell item provides the following scheduling properties:
- Day
- Period
- Start Time
- Length
- End Time
You do not need to assign all of these properties. At a minimum, you must select:
- A Day field, and
- Either:
- A Period field, or
- A Start Time and End Time field, or
- A Start Time and Length field
Note: If you are importing a timetable that uses periods, make sure the periods and their corresponding start and end times have already been defined in the Resources pane before starting the import.
Once the import is completed, the scheduled cells will be created automatically and will immediately appear in the timetable.
Need help with importing?
The examples above demonstrate only a few common import scenarios. However, the program is highly flexible and can import data from almost any CSV file format.
If you need assistance importing your data, please contact us at support@lantiv.com. Send us the CSV file you want to import—or at least a few sample rows—and we will provide specific guidance on how to configure the import settings for your data.
The next chapter: Working Online.