Interactive Timetabling
In the Interactive mode (as opposed to the Automatic mode), you can schedule activities, move them, and delete them freely according to your own judgment. In this chapter, we will explain how to schedule activities using drag-and-drop, as well as how to move and delete existing cells.
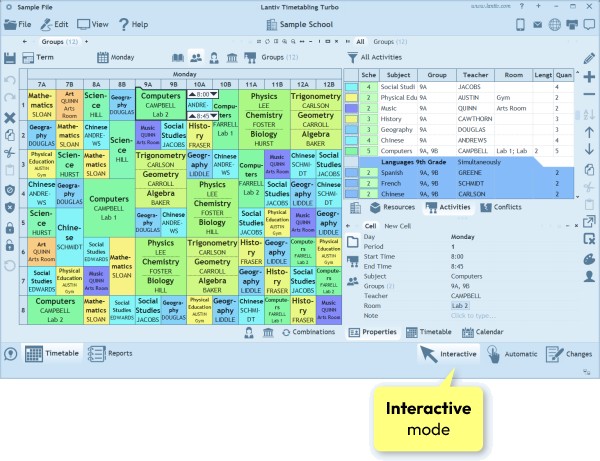
You can switch between the Interactive and the Automatic modes using the buttons located at the bottom-right corner of the screen:
Contents
Scheduling New Cells
A Cell is a scheduled instance of an activity. This section explains the different methods for scheduling new cells.
How to schedule an activity using drag-and-drop?
In this section, we will learn how to schedule a single occurrence of an activity using drag-and-drop. An occurrence of an activity on a specific day and time means that all of the activity's resources are booked for that time slot. A cell will then appear in each of their timetables, displaying the details of that activity.
To schedule a single occurrence of an activity, drag it (using the mouse) from the list of activities to the main timetable and drop it onto the desired period. Let’s go through the exact steps:
- First, place the mouse cursor over the leftmost column in the activities list — the column that displays the activity's color. Notice that the cursor changes to a hand cursor.
- Next, press and hold the left mouse button. This initiates the drag-and-drop operation. You will see a preview of the activity’s cell appear beneath the mouse cursor.
- As soon as the drag-and-drop begins, the main timetable window will display the conflict prediction stripes. These colored stripes indicate when the activity's resources are available (green), double-booked (yellow), or blocked (red). This visual guidance helps you choose a time slot where the activity can be scheduled without creating any conflicts.
- While continuing to hold the mouse button, move the cursor over the main timetable. A preview cell will follow the cursor as you move it. When you are satisfied with the target position, release the mouse button. The activity will be scheduled, and the drag-and-drop operation will be completed.
How to schedule an activity using copy/paste?
Another way to schedule one or more occurrences of an activity is by using copy/paste. The process is straightforward: select an activity from the list, copy it, choose a time range in the main timetable, and then paste it. Let’s walk through the steps.
- First, select an activity by clicking on it.
- Then click the Copy icon in the right-hand toolbar, or press Ctrl+C on your keyboard.
- Next, select the time range where you want the activity to be pasted. The selected range may span multiple days, or you can paste the activity separately for each day.
- Finally, click the Paste icon in the left-hand toolbar, or press Ctrl+V on your keyboard.
Instead of using the navigation pane at the top of the main timetable to choose which timetable is displayed, there is another way — one that is especially convenient while scheduling activities. Simply double-click the name of a resource in the activities list. The timetable of that resource will immediately appear in the main timetable window.
Note: If you double-click a cell in the activities list that does not contain a resource name, but instead displays a textual property of the activity or statistical data (such as the "Scheduled" column), the activity’s timetable will be displayed instead.
How to view both the group timetable and the teacher timetable while scheduling?
When scheduling activities using drag-and-drop (or when moving existing cells), the program can automatically display both the group timetable and the teacher timetable on one screen. This is done by clicking the Timetable tab in the bottom-right corner of the screen (next to the Properties tab).
The Timetable tab always displays the timetable of the currently selected resource or activity, and you can choose the resource type at the top of the Timetable pane. For example, if the group timetable is displayed in the main timetable window, you can click the teacher icon at the top of the Timetable pane to display the teacher's timetable there, while the group timetable remains visible in the main timetable window.
What if all vacant cells are unsuitable?
Especially in the final stages of timetable construction — when most activities have already been scheduled — placing new activities can become challenging. It may be difficult to find a time slot in which all of the activity’s resources are free. For example, the group may be available while the teacher is not, or vice versa. The room may also be occupied during most periods, adding yet another constraint.
In such situations, the Interactive mode provides a powerful solution: the Combinations engine. This tool automatically searches through a vast number of possible arrangements to find a way to schedule the activity by intelligently moving other already scheduled activities to alternative time slots. By freeing the necessary resources, it enables the original activity to be placed successfully. The Combinations engine is explained in detail in the Combinations chapter.
Working with Scheduled Cells
In this section, you will learn how to move, duplicate, resize, and delete scheduled cells.
How to move a cell?
Cells are moved using drag and drop. However, unlike scheduling a new activity, the cell must first be selected.
- To select a cell, simply click on it.
- Once selected, a small tab will appear in the cell’s top-left corner. This tab is important — you must position the mouse cursor over it in order to move the cell. When the cursor is placed over the tab, it will change into a hand cursor. This indicates that the cell can be dragged.
- Press and hold the mouse button to begin dragging. As you do so, the timetable will display the colored conflict prediction stripes, just as when dragging an activity.
- Move the mouse to the desired period and release the mouse button to complete the move.
How to duplicate a cell?
In addition to moving a cell with drag and drop, you can also duplicate it. To copy a cell, perform the drag-and-drop operation using the right mouse button instead of the left, or hold down the Ctrl key while dragging the cell. The original cell will remain in place, and a new cell — a duplicate of the original — will be moved as you drag.
Tip: If you need to schedule the same activity multiple times, this method can save you time. The first time you schedule an activity, you drag it from the Activities pane on the right side of the screen. For subsequent occurrences, you do not need to return to the Activities pane. Instead, simply duplicate the cell you have already scheduled. This avoids unnecessary mouse movement back and forth across the screen.
How to delete cells?
Deleting cells is simple: whatever is selected will be deleted. After selecting the cells you wish to remove, press the Delete key on the keyboard or click the X button in the left toolbar. The selected cells will be deleted. You can always restore them using the Undo button.
It is also important to note that you can delete partial cells. The time markers displayed next to a selected cell allow you to adjust the selected time range. By dragging the top marker downward or the bottom marker upward, you can select only a portion of the cell. If you then press the Delete key, only the selected portion will be removed, while the remaining part of the cell will stay unchanged.
How to adjust the duration of a cell?
The program allows you to set the duration of any cell in exact minutes. For example, if you have scheduled a cell for an entire period and would now like to adjust its duration to cover only part of the period, or one and a half periods, you can do this by editing the cell's start and end times.
To do this, first select the cell. Its Start Time and End Time will then appear in the Properties pane in the bottom-right corner of the screen. You can now edit these times, and the cell will automatically adjust to the updated times.
How to change the room of a cell?
Every cell of the same activity can be assigned a different room, including rooms other than the one originally assigned to the activity in the Activities list. To change the room of a cell, first select the cell, then edit its Room property in the Properties pane.
Note: When selecting a room in the Properties pane, the program automatically highlights available rooms with a green stripe next to their names. In addition, if specific rooms have been explicitly associated with the subject of the activity you are editing (through the subject's Rooms property), the room list will automatically be filtered to show only the rooms relevant to that subject.
Availability of Resources
For various reasons, a resource may not always be available for scheduling. For example, a teacher may have a day off on a particular weekday, or a room may be reserved for an extracurricular activity at certain times. When such information is known in advance, you can enter it into the program so that it prevents you from scheduling activities at times when a resource is unavailable.
To mark a resource as unavailable, simply block out the relevant cells in their timetable. No activity can be scheduled in a blocked cell without triggering a conflict.
To block cells, first select the desired time range. Then use one of the following methods:
- Main menu: Choose Edit → Block.
- Toolbar: Click the Block button on the left-hand toolbar.
- Keyboard: Press the Plus (+) key.
Tip: You can also add a note to a blocked cell using the Properties pane.
How to check which resources are available at a particular time?
To see which resources are available at a specific time, first select the desired time range in the main timetable. Then click the Availability button located above the list of resources. The program will display a colored stripe next to each resource:
- Green – the resource is free
- Yellow – the resource is busy
- Red – the resource is blocked
Tip: If you select multiple time ranges (using Ctrl+Click), the availability will be calculated for all selected ranges. In this case, resources marked with a green stripe are free during all selected time ranges.
To hide the availability stripes, click the Availability button again (the button works as a toggle).
How to check which activities can be scheduled at a particular time?
Just as you can check the availability of resources for a selected time range in the main timetable, you can also check the availability of activities. First, select the desired time range in the main timetable. Then click the Availability button above the activities list. The program will display a colored stripe next to each activity:
- Green – the activity can be scheduled at the selected time range without causing any conflicts (all of its resources are free).
- Yellow – at least one of the activity’s resources is busy.
- Red – at least one of the activity’s resources is blocked.
- Blue – the activity is already scheduled at the selected time range.
How to check which cells can be moved into an empty cell?
If you want to find out which of the currently visible scheduled activities can be moved into a specific empty cell, follow these steps:
- First, select the empty time range in the main timetable.
- Then move the mouse cursor over the small tab located at the top-left corner of that empty cell. The cursor will change into a hand.
- Now press and hold the mouse button. While holding it down, colored stripes will appear on the left side of each scheduled cell:
- Green – the cell can be moved into the selected empty cell without causing any conflicts.
- Red – one of the resources assigned to that cell is unavailable at the time of the empty cell.
- None - moving that cell into the empty cell would create a conflict in one of the involved resource schedules.
Statistical Information
By now you have probably noticed the column titled "Scheduled" in the top-left corner of the activities list (it may appear as "Sched" if the column is too narrow). This column displays the total number of periods that have already been scheduled for each activity. Below, we will explain the different aspects of this column in more detail.
How can I view the total scheduled quantities for resources?
Just as you can see the scheduled quantity for activities, you can also have the program calculate and display the total scheduled periods for resources. To do this, open the Institution pane, go to the Properties page, and enable the Scheduled property for the relevant resource type.
For example, to display the scheduled quantities for teachers, enable the Scheduled property under Teacher. Once enabled, the teachers list will include a Scheduled column showing the total number of periods assigned to each teacher.
Note: The scheduled quantities are also displayed in every teacher popup list throughout the program.
Is it possible to display what remains to be scheduled instead of what is already scheduled?
Yes. Open the Institution pane, go to the Properties page, and expand the "Activity" item. There you will find a property called Unscheduled. The Unscheduled value is calculated as Quantity minus Scheduled. When you enable this property, the list will display the remaining number of periods to be scheduled for each activity.
Note: If you would like the Unscheduled column to appear as the first column (just like Scheduled), move the Unscheduled property to the top of the list. To do this, select Unscheduled and click the up arrow button in the right-hand toolbar repeatedly until it reaches the top.
Are two simultaneous cells counted as 1 or 2?
As you know, groups, subjects, and rooms are resources that may contain sub-resources. For example, a group can include several sub-groups. When two sub-groups are scheduled at the same time (which is not considered a conflict unless they share students), both cells appear in the parent group’s timetable. As a result, the parent group may show two cells scheduled simultaneously. In this case, how does the program calculate the parent group’s scheduled total? If both cells are one period long, does it add 1 or 2 periods?
By default, the program adds 1 period. However, you can configure the program to sum all cells, including those that overlap. To do this:
- Open the Institution pane and go to the Properties page.
- Under the relevant resource type, select the Scheduled property.
- In the lower Properties pane, locate the Overlapping cells option.
The default setting for this property is Not Summed. If you change it to Summed, the program will count all overlapping cells in the total.
The next chapter: Conflicts.