
Student Enrollment
The software allows you to create individual student timetables by enrolling students in activities. Students can be enrolled either manually or automatically based on their elective subject choices.
When students are enrolled automatically, the software evaluates all possible combinations of sections available to each student and selects the combination that produces a conflict-free timetable. During this process, it takes into account the maximum number of students allowed in each activity (subject section) and, if required, gender caps to ensure an even distribution of male and female students.
Contents
- 1 Enrollment Scenarios
- 2 How to assign the subjects a student will study?
- 3 How to manually enroll students in activities?
- 4 How to manually enroll a student in subject sections?
- 5 How to automatically enroll students in subject sections?
- 6 How to define a choice between several subjects?
- 7 How to lock student enrollment to prevent automatic changes?
- 8 How to optimize student enrollment?
- 9 How to balance student counts across sections?
Enrollment Scenarios
There are two main scenarios in which students are enrolled in activities:
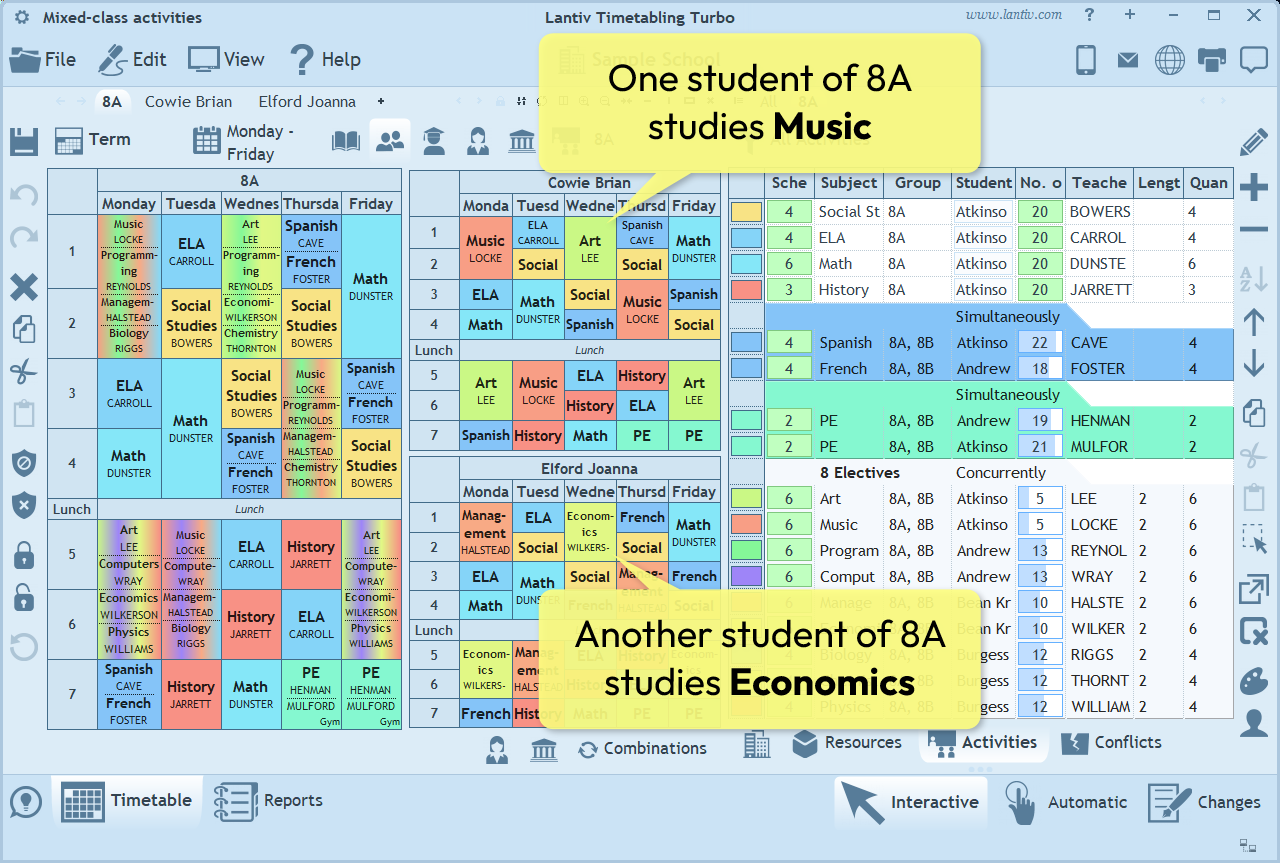
- Mixed-class activities - students belong to homeroom classes and are split into subject-specific groups for some subjects.
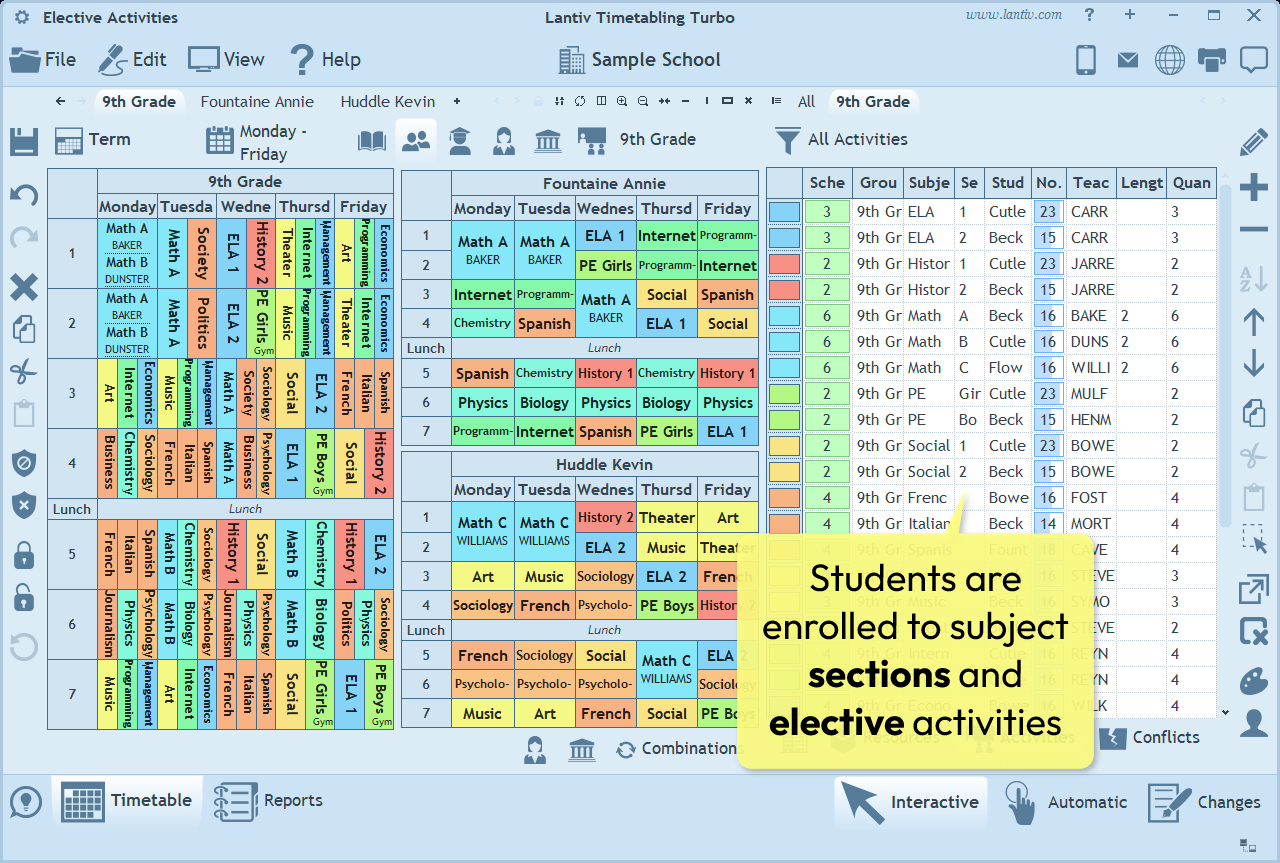
- Elective activities - students are enrolled directly into subject sections based on their chosen subjects, without belonging to fixed homeroom classes.
Mixed-class activities
In this scenario, students primarily belong to their homeroom class (e.g., 7A or 7B), but for certain subjects they are assigned to subject-specific activities that may include students from multiple classes (e.g., Math Level 1 and Math Level 2 for students from both 7A and 7B, or Spanish and French language groups). In this case, there is no need to specify students for the homeroom class activities, since all students in the class participate. However, for the mixed-class activities, you can specify the exact students assigned to each activity.
Elective activities
In this scenario, students are not assigned to homeroom classes. Instead, each student has a personalized set of subjects, and the software assigns students to the appropriate sections based on their grade and subject selections. Since students may choose different combinations of subjects, each student can have a unique timetable.
How to assign the subjects a student will study?
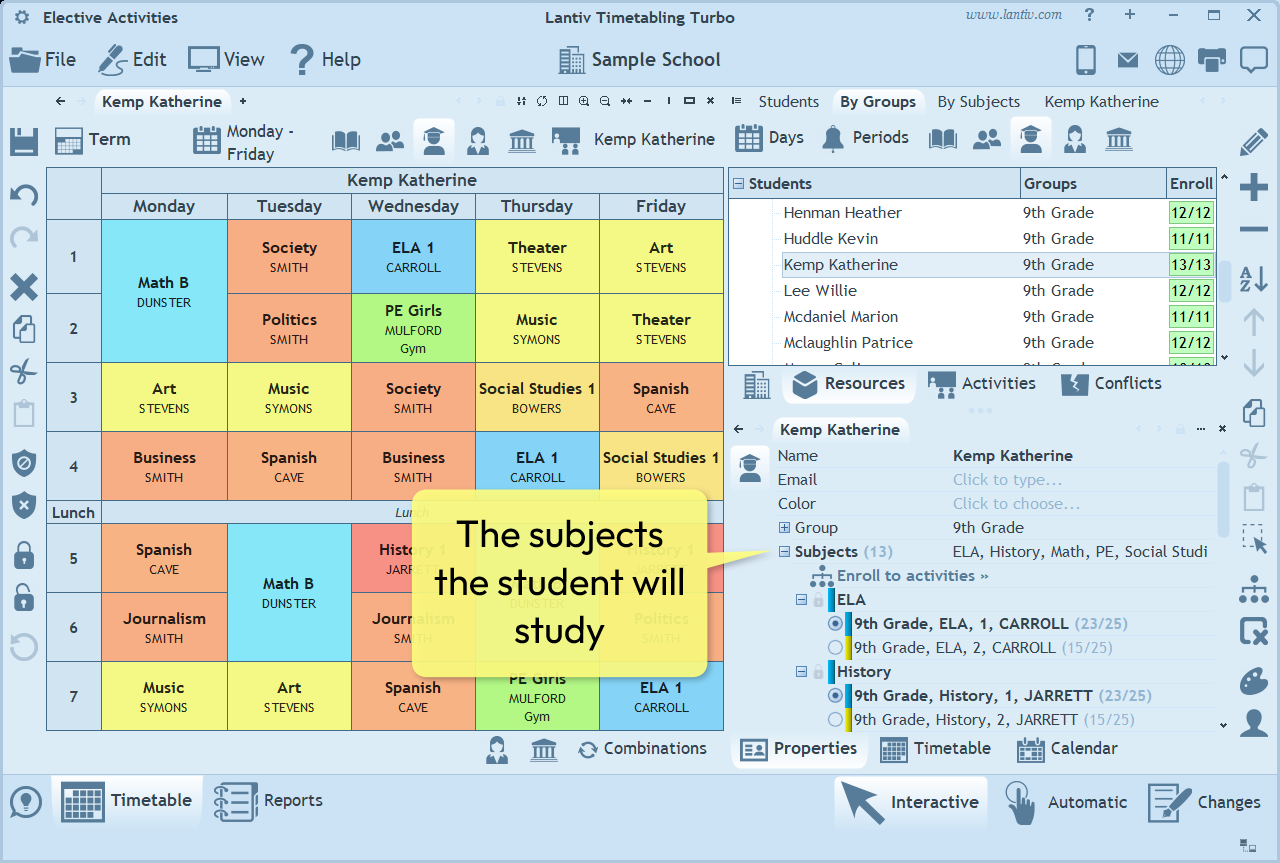
For both manual and automatic enrollment, you can specify the subjects a student is expected to study by filling in the student's Subjects property.
When assigning students to activities manually, this information allows the program to filter the student list and display only those students who are relevant to the subject (and group) of the activity.
When students are enrolled automatically, the program attempts to enroll each student in all of their selected subjects while ensuring that no conflicts are created in the student's timetable.
The students' Subjects property can also be imported from an external CSV file. The CSV file should contain the student name (or ID) in one column and one or more subjects in another column. Such file can then be easily imported into the program.
How to manually enroll students in activities?
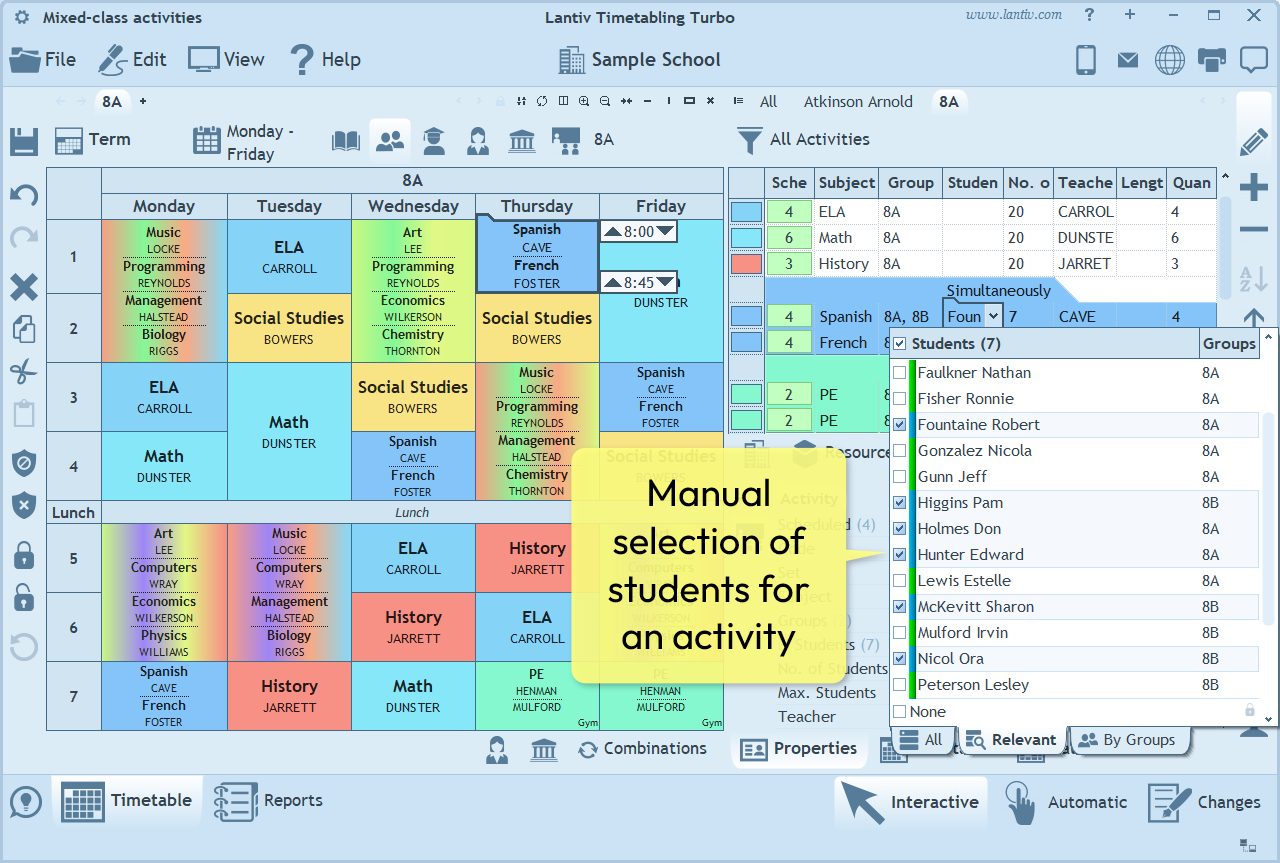
To manually select which students participate in an activity, simply fill in the activity's Students property.
If the activity specifies a group, all students listed in the group's Students property are, by default, considered participants in the activity. However, once students are explicitly selected in the activity's Students property, this overrides the group's student list, and only the selected students will be considered participants in the activity.
Note: When groups represent classes (e.g., 7A, 7B), most activities do not require explicit student assignments because the list of participating students is inherited from the group. However, when groups represent grades (e.g., 9, 10, 11), each activity typically requires an explicit list of students. In this case, you should first select None in the activity's Students property to prevent all students in the grade from being included as default participants. You can then either manually select the specific students who should participate in each activity, or allow the program to enroll them automatically, as explained later.
How to manually enroll a student in subject sections?
When you select a student in the student list in the Resources pane and display the student's properties, you will see a small plus button next to the Subjects property. Clicking this button displays the available sections (activities) for each subject.
To enroll the student in a section, simply click the desired section. If the student is already enrolled in a different section of the same subject, they will automatically be unenrolled from the previous section and enrolled in the newly selected one.
For each section, the program displays a colored stripe indicating whether the student can be enrolled in that section without creating a conflict in the student's timetable. A green stripe indicates that the student can be enrolled without conflicts, while a yellow stripe indicates that enrollment would create a double-booking conflict.
The student's timetable is updated immediately to reflect the change and will display the timetable cells of the newly assigned section.
How to automatically enroll students in subject sections?
To have the program automatically and optimally enroll students in sections based on their chosen subjects, click the Enroll to Activities link in the Properties pane under the Subjects item. Alternatively, select one or more students in the student list and click the Enroll button on the right-hand toolbar.
To enroll all students, first click the Select All button and then click the Enroll button on the toolbar.
How to define a choice between several subjects?
If students can choose one subject from several subjects within the same category, this can be defined in the software. During automatic or manual enrollment, the program will enroll the student in only one section from that category.
The subjects in the category can either have equal priority, or you can assign priorities (for example, Choice 1, Choice 2, and Choice 3). These priorities are taken into account during automatic enrollment.
To define a "one-of" choice category, use the Category column in the student's Subjects list. Open the student's Subjects property, and you will find the Category column on the right side of the list.
- To define a category without priorities, enter the same single-digit number (that's higher than 1) for all subjects in that category. For example, if a student should be enrolled in either Art or Music, enter 2 in the Category column for both subjects.
- To define a prioritized category, enter a two-digit number for each subject. The first digit specifies the category, and the second digit specifies the priority. For example, if a student should be enrolled in Art, Music, or Band, in that order of preference, enter 11 for Art, 12 for Music, and 13 for Band. During automatic enrollment, the program will first try to enroll the student in Art. If no suitable section is available, it will try Music, and if that is not possible, it will try Band.
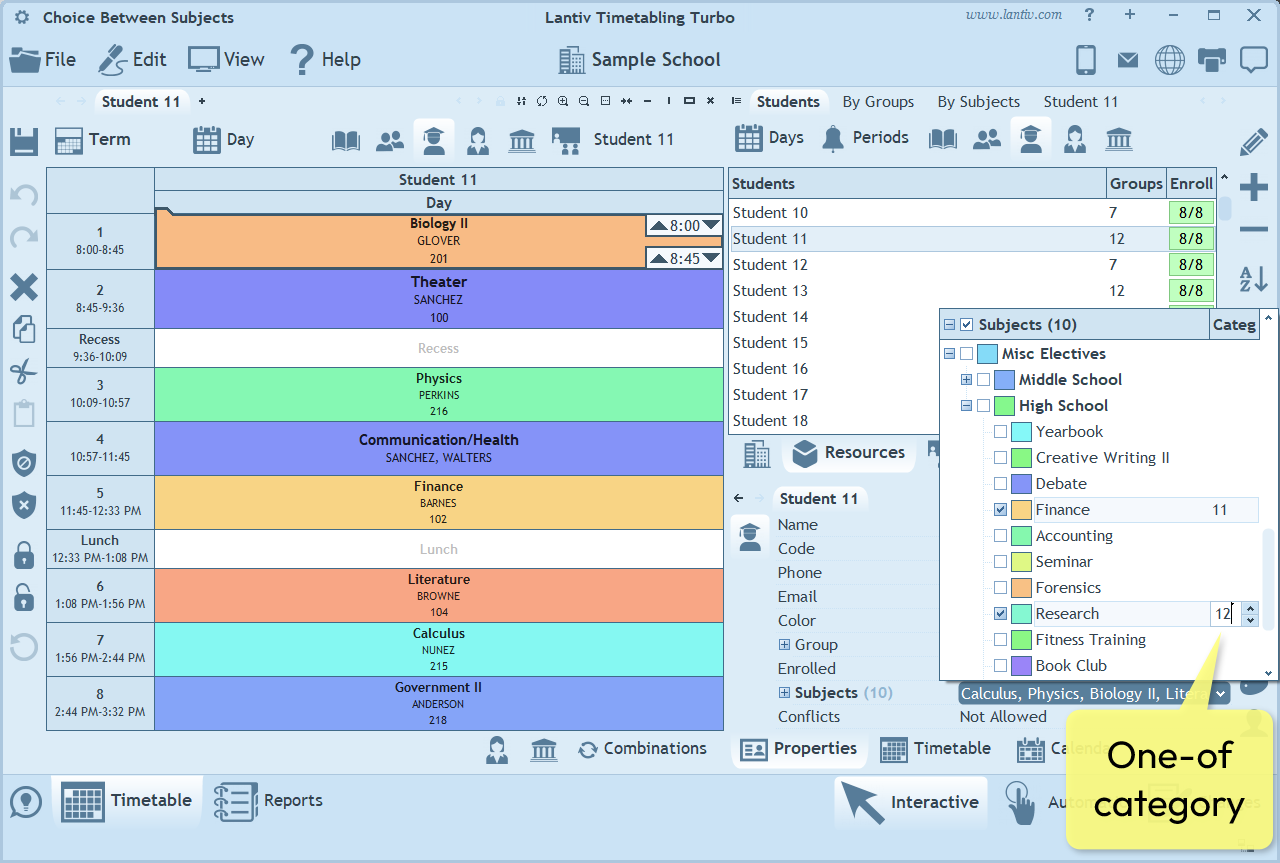
Note: It is also possible to import student subjects together with their one-of categories. To do this, place each choice category on a separate row in the imported CSV file, with each subject in a separate column, and select the import option "Each row of student subjects is a separate choice category".
How to lock student enrollment to prevent automatic changes?
When you already know which section a student should attend for a particular subject, you can lock that student's enrollment to prevent the automatic enrollment process from assigning the student to a different section.
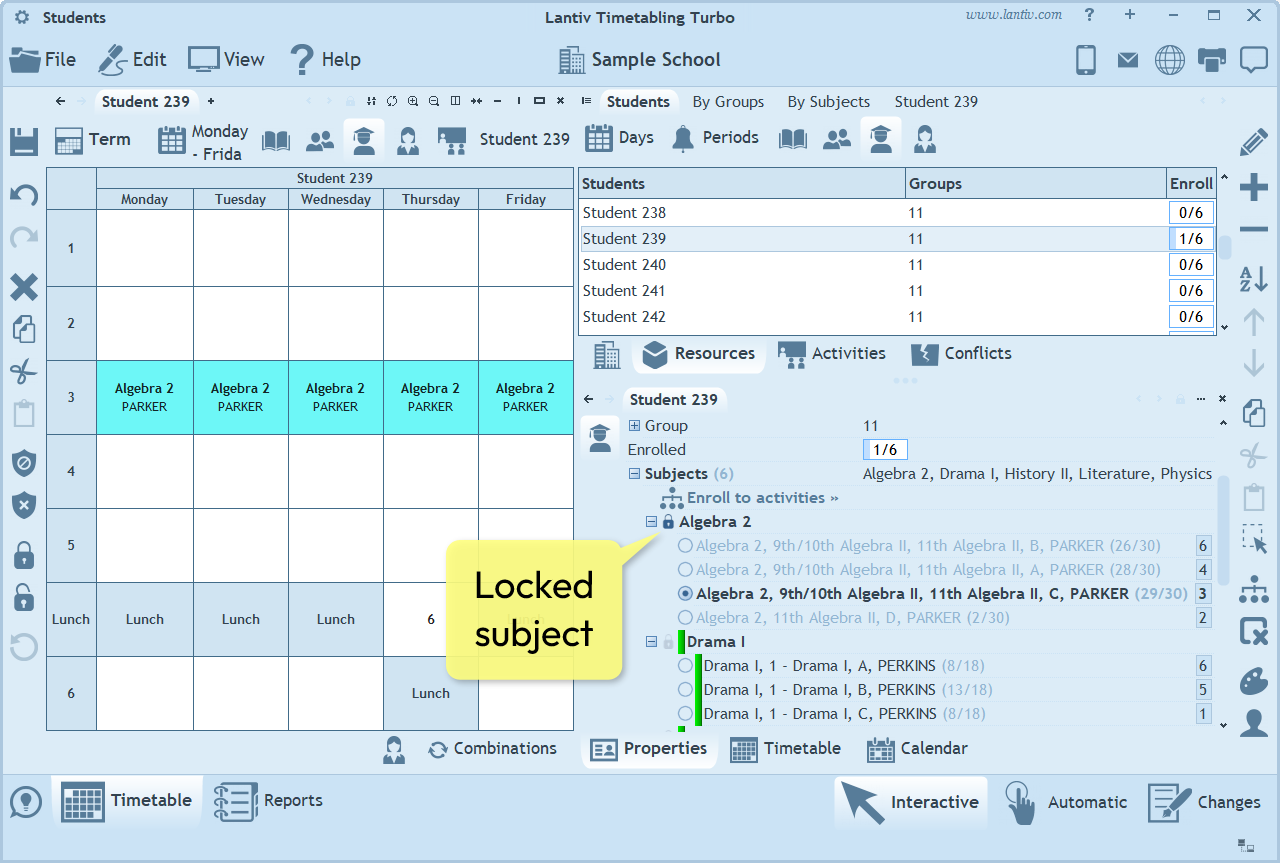
- To lock a student to a specific subject section, click the lock icon next to the subject's name in the student's properties.
- To lock all sections the student is currently enrolled in, right-click the student's properties and select Lock Enrollment.
After a student's enrollment is locked for a specific subject, the automatic enrollment process will neither remove the student from that section nor move the student to another section of the same subject.
The lock applies only to the subjects that have been locked. For all other subjects, the program will continue to enroll the student automatically during the automatic enrollment process.
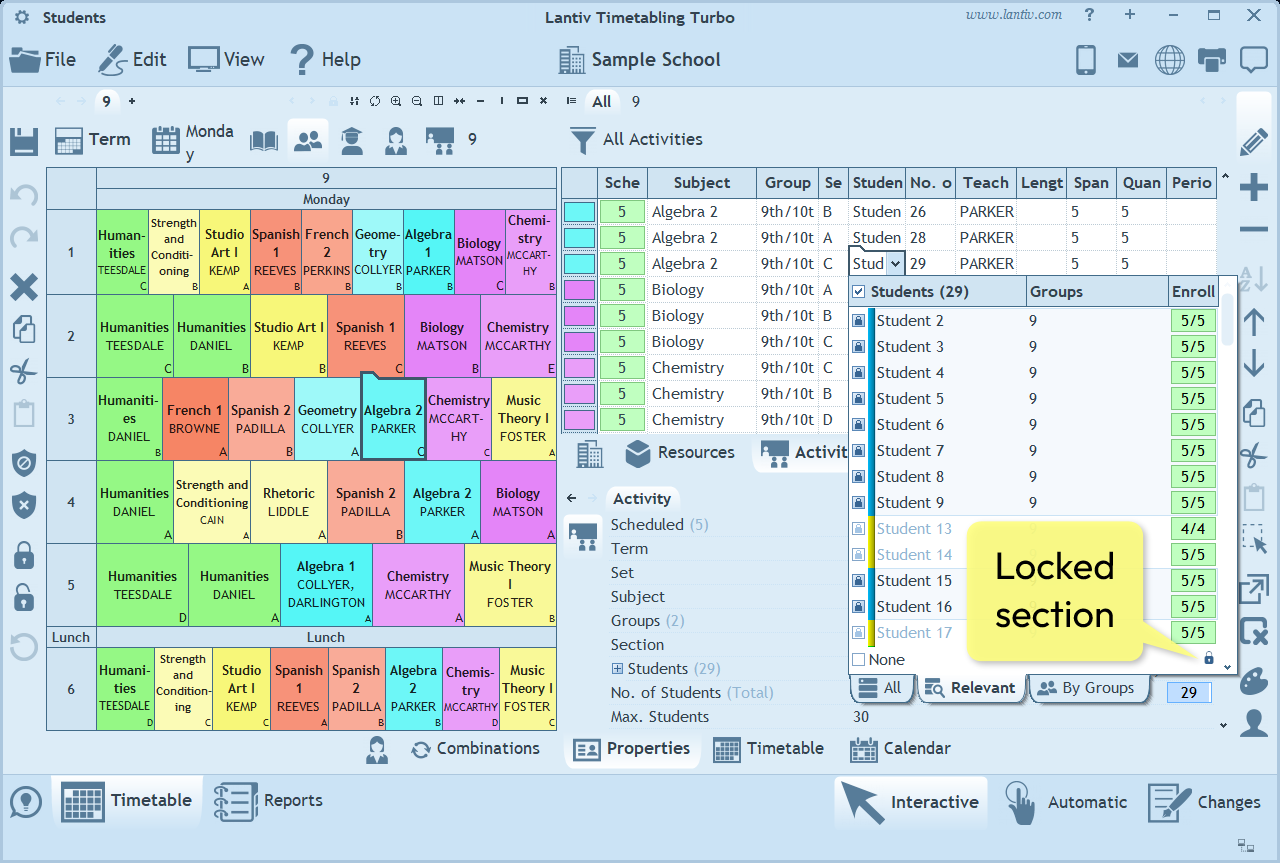
It is also possible to lock an entire section. This is done in the Activities list, by editing the Students field of an activity and then clicking the lock icon in the bottom-right corner of the student list.
When a section is locked, the students currently enrolled in that section will not be moved to another section during the automatic enrollment process. In addition, no other students can be enrolled in the locked section automatically.
How to optimize student enrollment?
The basic automatic enrollment process does not move sections to different time slots. It only maximizes the number of sections each student can be enrolled in based on the current schedule. For each student, the algorithm evaluates all possible combinations of sections and selects the optimal one.
Although this produces the best possible enrollment for the current schedule, it is often not sufficient. To further improve enrollment, we need to:
- Reschedule sections to different time slots to create a better enrollment outcome.
- Create and schedule additional sections, providing more flexibility and opening up new enrollment possibilities.
Both of these tasks can also be performed automatically using the Combinations engine. The Combinations engine explores many different ways of rearranging the schedule itself. For each rearrangement, it performs an optimal automatic student enrollment, evaluates the resulting enrollment, records the outcome, and then continues searching for additional possibilities.
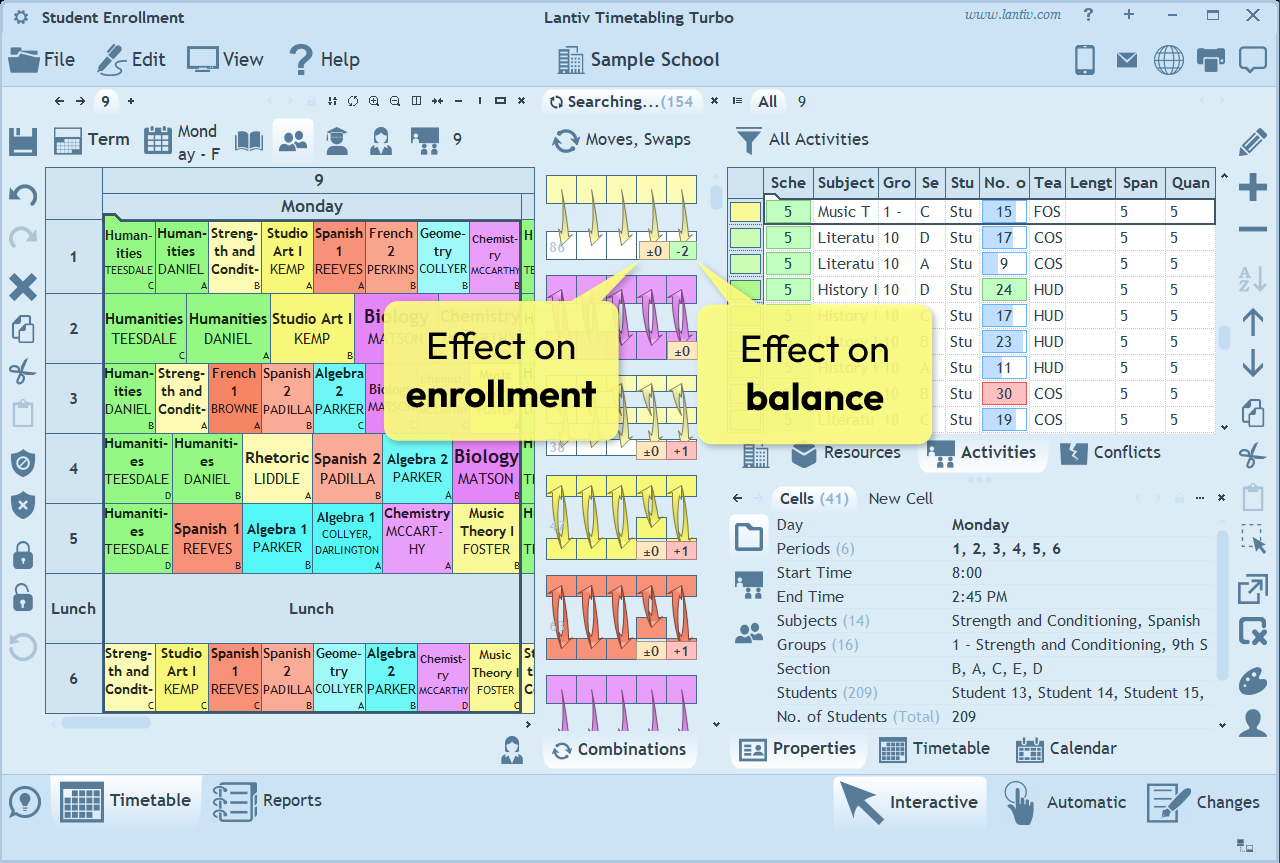
Each rearrangement found by the Combinations engine is displayed as a thumbnail showing both the changes to the schedule and their effect on enrollment. For example, if a rearrangement increases the total number of sections students are enrolled in by 5, the thumbnail displays +5 in its bottom-right corner. The best arrangements are always shown at the top of the list.
The Combinations engine is launched by clicking the Combinations tab at the bottom of the screen:
- To find ways to rearrange a student's sections, select the section cells and then click the Combinations tab. The Combinations engine will search for alternative arrangements that improve student enrollment.
- To find ways to schedule a new section (activity), select the activity and then click the Combinations tab. The Combinations engine will search for possible time slots to schedule the new activity in order to improve student enrollment.
How to balance student counts across sections?
Each section allows you to define the maximum number of students using its Max. Students property. If the Gender property is enabled for students, you can also define separate maximums for each gender. For example, you can set the total maximum to 30 students, with no more than 15 students of each gender.
When students are enrolled automatically, the program respects these limits and tries to distribute students evenly across sections while avoiding capacity violations. However, if the only way to enroll a student is to exceed a section's limit, the student will still be enrolled, and after enrollment the program will report that section as overcrowded by the corresponding number of students.
In situations where the current timetable makes some overcrowding unavoidable, the Combinations engine can be used to improve the balance between sections. As explained previously, clicking the Combinations tab searches for ways to move or swap timetable cells in order to improve student enrollment. At the same time, it also evaluates how each combination affects the balance between sections and reports combinations that reduce violations of the Max. Students limits.
For example, a combination may have no effect on student enrollment but still improve the section balance. In this case, the combination thumbnail will display two numbers in its bottom-right corner. The first number will be 0, indicating that the combination neither increases nor decreases enrollment. The second number will be a green negative value, such as -5, indicating that the total violation of the Max. Students limits is reduced by five students. This may represent a single section whose enrollment decreases from 35 students to its limit of 30, or a smaller improvement distributed across several sections.
By repeatedly applying the suggested combinations, you can gradually improve the balance between sections until all sections are within their defined Max. Students limits.
The next chapter: Daily Changes.